SVGs for the Web

In the world of front-end web development, few tools are as powerful as Scalable Vector Graphics (SVGs). They enable us to create graphics that are compact in file size, arbitrarily scaleable without losing quality, and controllable via CSS and JavaScript.

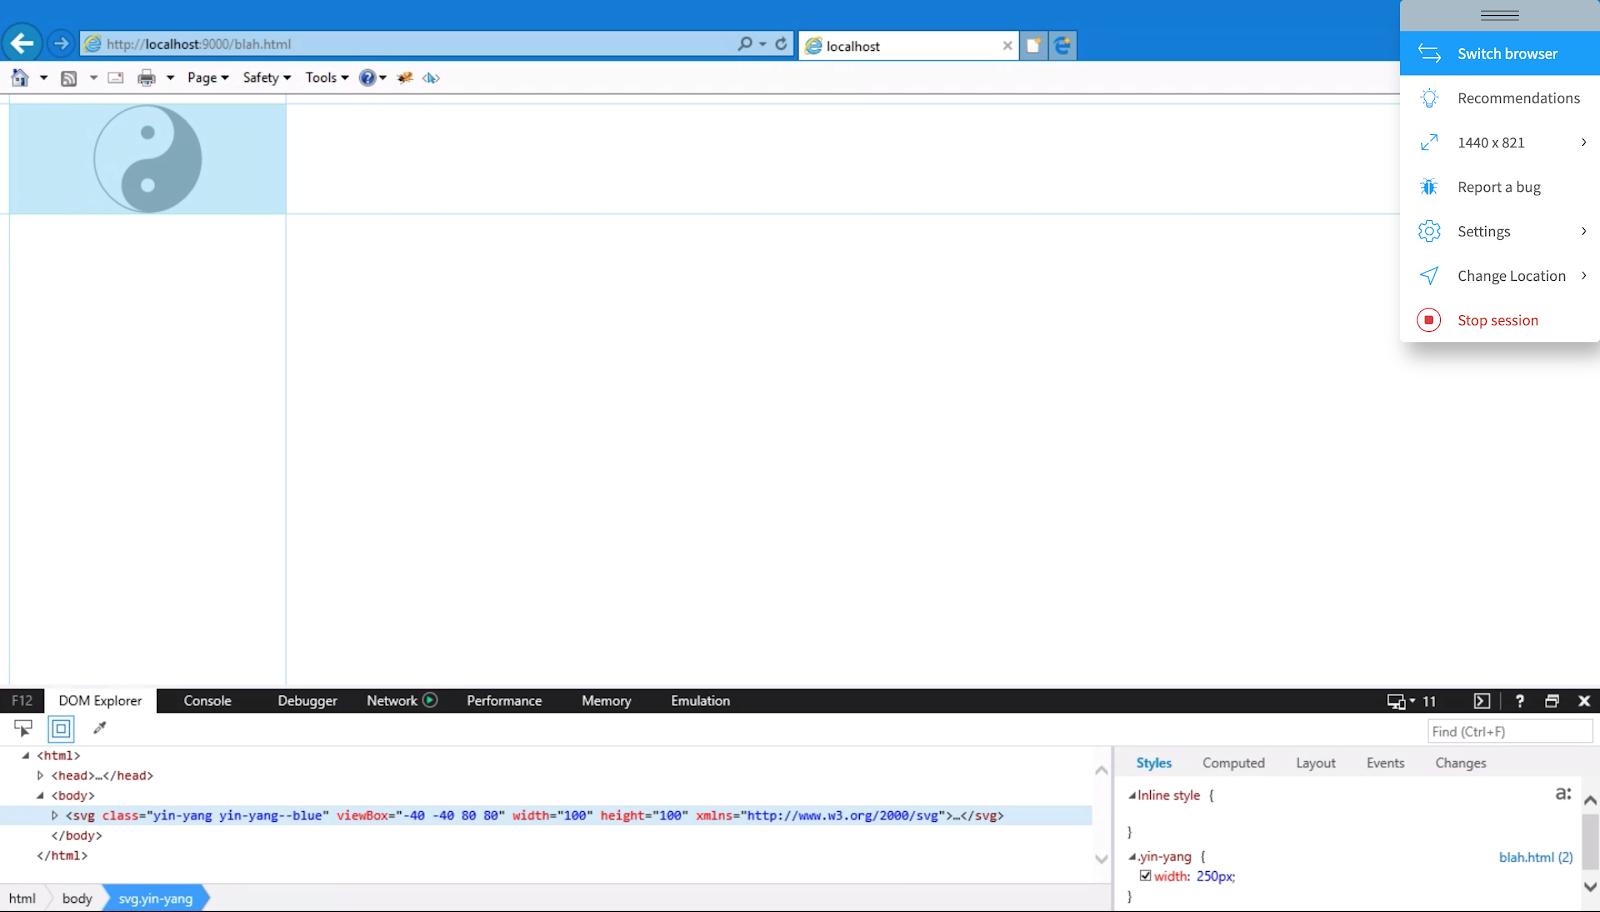
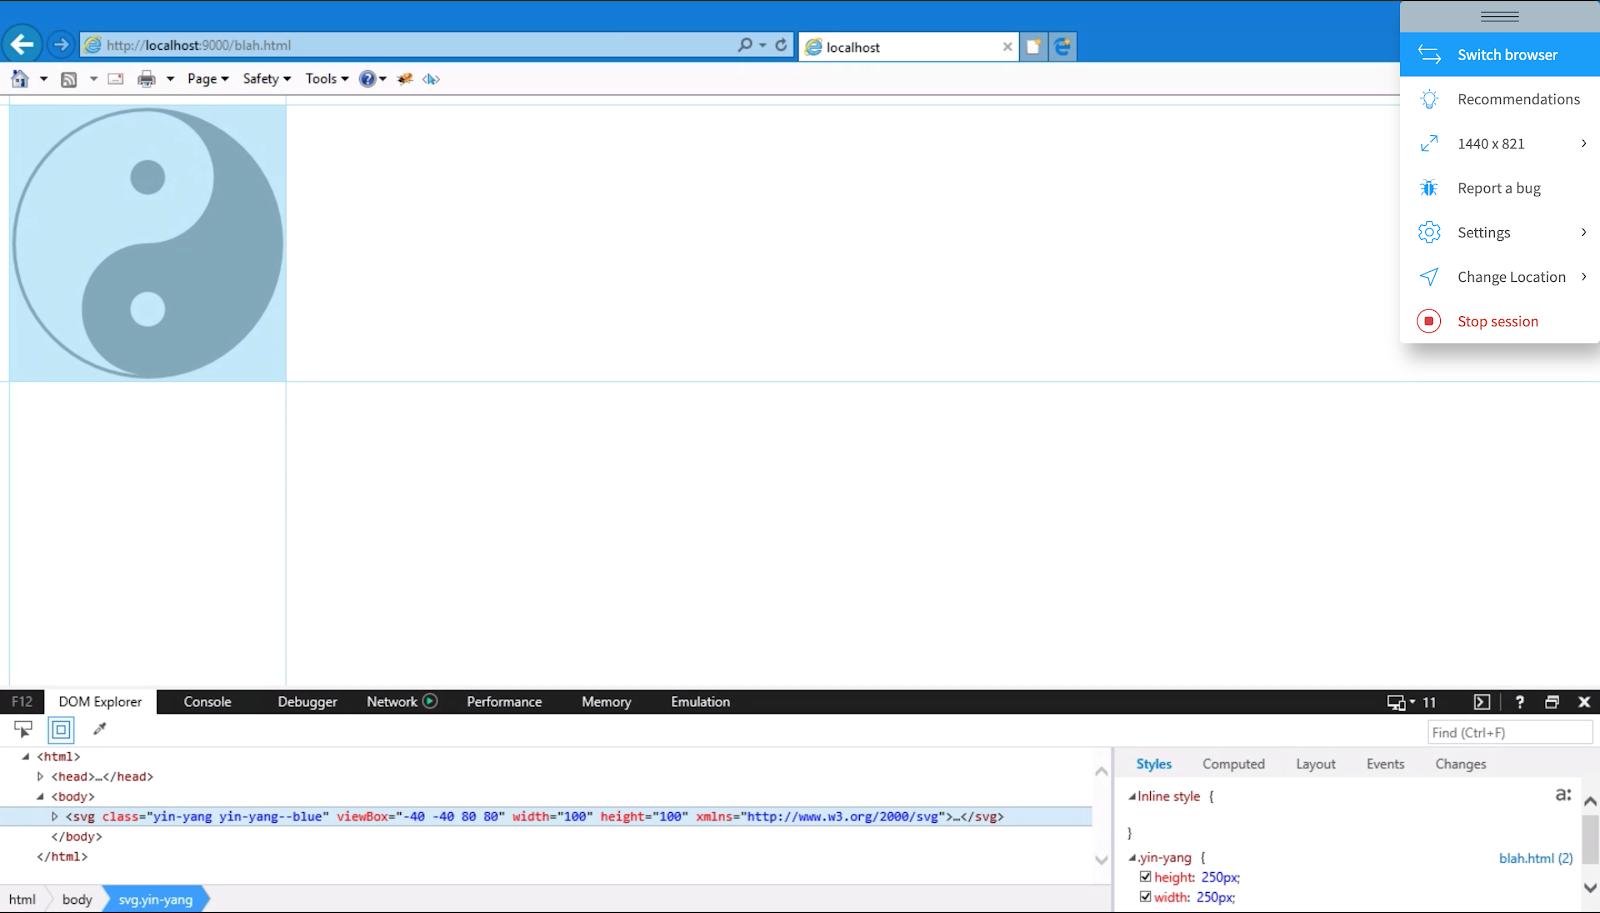
The power of SVGs, however, was not always known to us in the world of web development. Depending on who you ask, cross-browser support for SVGs didn't come about until the release of Internet Explorer 9 in 2011. Since then, front-end developers still face frustrating inconsistencies in how IE chooses to resize them.

Because SVGs are such a relative newcomer to the FE frontier, our team has yet to establish a codified process for working with them. As such, this post aims to explore the fundamentals of the SVG standard as it applies to front-end web development, and in the process to outline a formal set of guidelines for working with SVGs.

When to Use SVGs

As vector graphics, SVGs provide us with virtually unlimited scaling capabilities. Furthermore, as XML-based files, SVGs can also behave like DOM elements, and thus can be controlled via CSS and JavaScript. With these two strengths in mind, we can see that SVGs are particularly well-suited for the following cases:

  • You need a graphic that can be scaled without losing quality (e.g. icons that may be small in some contexts and large in others, or that need to display at 2x for high-resolution displays
  • You need a graphic that can be manipulated through CSS (e.g. icons that change color on hover
  • You need a graphic that can be manipulated through JavaScript (e.g. an interactive map with tooltips for different locations

For Designers: Exporting a Web-Friendly SVG

If you're using software like Adobe Illustrator to create an SVG, we recommend following the guidelines below to ensure that the file can be easily implemented for the web.

Name Your Layers, and select "Object IDs: Layer Names"

Providing each layer with a meaningful name will make it much easier for a developer to delineate the various elements of an SVG. This is particularly important for interactive SVGs with many different parts. Grouping related layers together can also be similarly helpful, provided that the group is named clearly as well. Then, when you go to export the SVG, just be sure to select "Object IDs: Layer Names".

Fit To Artwork Bounds

In the vast majority of cases, it is best to trim any surrounding space from an SVG before exporting it; this allows the front-end developer to control the space around the graphic with CSS alone. In Illustrator, this is achieved with the "Fit to Artwork Bounds" command. When performing this fitting, one should ensure that no part of the SVG falls outside the bounds; this often happens when trying to fit artwork that uses clipping masks.

Set "Styling: Presentation Attributes"

This export setting applies styles via presentation attributes (e.g. fill="#fff") as opposed to applying it as internal or inline CSS (if possible). Of the three settings, this one is the easiest to override with external CSS — the others requiring the use of the dreaded !important declaration.

Leave "Minify" and "Responsive" unchecked

While we do want our SVGs to be both minified and responsive, this is best accomplished during implementation of the SVG, and not at the export stage.

Anatomy of a (Good) SVG

Some SVG attributes are absolutely required for the SVG to function correctly on the web, while others are either recommended or wholly unnecessary. Let's take a look at some of the most common ones.

<title>

Each SVG should be labelled with a descriptive title tag, which should be the first child of the parent SVG. The title tag is required for screen readers, and is also shown as tooltip text when hovering over the SVG. Note that if the SVG is later embedded as an <img> tag, an alt attribute is still recommended for accessibility

viewbox

The viewbox attribute is absolutely necessary for an SVG to scale properly. It effectively defines the position and dimension of the SVG's viewport.

width and height

Just like other HTML entities, SVGs can have their width and height set via attributes. Even if the SVG is to be resized via external CSS, the width and height attributes should be set to reasonable initial values, if nothing else to prevent Flash of Unstyled SVG (FOUSVG).

xmnls

Short for "XML namespace", this attribute tells the browser which XML namespace should be used to interpret the SVG. In most cases the value for this attribute should be http://www.w3.org/2000/svg. This attribute should almost always be included, as it’s required in most embedding methods.

xmlns:xlink

This attribute is responsible for namespacing attributes within the SVG that link to external resources via the XML Linking Language (XLink) specification. Its standard value is http://www.w3.org/1999/xlink. If your SVG already has this attribute, we recommend leaving it in place.

version

This attribute, despite being part of the image/svg+xml file standards, is ignored by every user agent, and thus can be safely omitted.

Choosing How to Embed an SVG

While there are as many as six different ways to implement an SVG on a web page, there are really only three that we need to concern ourselves with, and this handy decision tree will help you decide which is best for your use case:

Does the graphic need to be manipulated with external CSS or JS?
  • If yes, do you have a means to easily embed the SVG inline with your HTML?
    • If yes, embed the SVG inline.
    • If not, embed the SVG using an <object> tag.
  • If not, use an <img> tag.

Now let's take a look at some examples of these three implementation schemes.

SVG via <img>

This approach is perhaps the easiest way to get an SVG on a webpage. It has the added benefit of supporting browser caching, perfect for graphics that show up frequently on a site.

To implement an SVG using this approach, simply provide the path to the SVG file as the src attribute of the <img> tag, just like you would normally.

          
<img src="/img/svg/yin-yang.svg" alt="Yin Yang Symbol">
          
        
Just like with non-vector <img> tags, a meaningful value for the alt attribute should be provided.

Inline SVG

This approach is only recommended if you have a means by which to modularly include your SVGs inline. Otherwise, maintaining these inline SVGs is tedious and error-prone.

There are many inlining utilities out there, but the two illustrated below are Grunt Include Replace and the Inline SVG gem for Rails.

          
@@include("svgs/yin-yang.svg")
          
        
Inlining an SVG using the Grunt includereplace task
          
<%= inline_svg("svgs/yin-yang.svg") %>
          
        
Inlining an SVG using the inline_svg Rails gem

A Note About IE

As mentioned earlier, Internet Explorer is a bit temperamental when it comes to resizing SVGs. One particular problem we run into frequently is trying to implement a responsive inline SVG that works for IE versions 9 through 11. For some bizarre reason, if you create an inline SVG where only the width is set (either through HTML or CSS), the browser cannot properly calculate the SVG’s height, even when the viewbox attribute is included. The same thing happens if the height is supplied rather than the width.

IE can’t seem to figure out that the SVG should also have height: 250px, based on the viewbox.
Once the height is manually set, the SVG is sized properly.

For inline SVGs, you must explicitly set both the width and the height on the SVG for the browser to render it correctly. Unfortunately, this means that a truly responsive inline SVG (e.g. width: 100% and height: auto, preserving aspect ratio) is not achievable in IE. You must either resort to breakpoint-specific sizing or embedding the SVG in a different way.

SVG via <object>

This approach should only be used if you need CSS and/or JS manipulation of the SVG, but have no easy way to inline the SVG into your page. It looks similar to the <img> approach, except that the path to the SVG file is provided via the data attribute. Note that the inner text will only appear in rather old browsers that don’t support embedding SVGs in this way.

          
<object type="image/svg+xml" data="img/svgs/yin-yang.svg">Your browser does not support SVGs</object>


One major downside of this approach is that any CSS and/or JS files required for manipulation need to be linked from within the SVG file itself, like so:

          
<?xml-stylesheet type="text/css" href="../../styles/main.css" ?>   
<svg class="yin-yang yin-yang--blue" xmlns="http://www.w3.org/2000/svg" width="100" height="100" viewBox="-40 -40 80 80">
  ...
</svg>


Moreover, the SVG can’t “know” the parent <object> that it exists within, so don’t use the <object> in any of your CSS selectors that target the SVG or its components. This approach, while far from optimal, still allows one to have a controllable SVG that is modularly contained in single file.

A Note About Minification

SVGs tend to have very small file sizes. Nevertheless, minifying your SVGs can improve your site’s performance, however incrementally. Since minified SVGs are very human-unreadable, we recommend integrating a minification tool like SVGO into your development process. This gives you the best of both worlds: a human-readable source SVG and a lean production SVG.

CSS Manipulation

Controlling an SVG with CSS couldn't be easier. Just like with HTML elements, we namespace our SVG with a class that corresponds to a style module. For instance, we've created a style module called yin-yang that controls the styling of the SVG.

See the Pen CSS Manipulation of Inline SVG by Nile Livingston (@nlivingston) on CodePen.

JavaScript Manipulation

Just as above, inline SVGs are controllable via JavaScript, just like any other DOM elements. As with our targeting of standard HTML elements, we advise applying a class, prefixed with the js- namespace, to attach functionality to SVGs and/or their child elements. In this case, we’ve created a module called js-active-hover that applies a CSS class active to certain components of the SVG when they are hovered on, and removes the class when they are hovered off

See the Pen JS Manipulation of Inline SVG by Nile Livingston (@nlivingston) on CodePen.

Animating SVGs

SVG animation is a complex topic, probably deserving of a post unto itself. The main thing to remember is this: inline SVGs and their component parts can be animated with CSS transitions, CSS animations, and JavaScript, just like any other DOM element. If you’re comfortable animating standard HTML elements, SVGs shouldn’t prove too difficult.

It’s also worth mentioning that there are plenty of SVG animation libraries available. One that we’ve had success with is Vivus, which allows you to animate an SVG to give it the appearance of being drawn. It’s only suited for a particular style of animation, but the functionality that Vivus provides is very configurable, well-documented, and reliable.

Take Over the World With Us

Work With Us

See how our ideas, insights and know-how can help you tackle your next project — or build a human-centered experience for your brand.

Services

Join the Team

Want to build something you believe in? See what it takes to become part of our fast-paced team of dreamers and innovators.

Open Jobs